> ## Documentation Index
> Fetch the complete documentation index at: https://docs.kua.ai/llms.txt
> Use this file to discover all available pages before exploring further.
# ASIN to Blog
> Convert Amazon ASIN to Blog
This guide will show you how to convert an Amazon ASIN to a blog post. This is useful for marketers who want to create a blog post for a product they are promoting.
## Import a Amazon Product
First, you need to import a product from Amazon. You can do this by using the [Import Amazon Product API](/api-reference/products/import-amazon-product)
to create an import job, each job can import at most 20 products.
Secondly, wait for a few seconds and check the status of the import job. You can use the [Get Import Task API](/api-reference/products/get-import-job) to check the status of the import job.
View the API documentation for the Import Amazon Product API
View the API documentation for the Get Import Job API
### Import a product
Let's import an sample ASIN: [B0953SDCRG](https://www.amazon.com/PETLIBRO-PLAF005-Automatic-Cat-Feeder/dp/B0953SDCRG).
```python theme={null}
import requests
url = "https://api.kua.ai/weaver/api/v2/products/import/amazon"
# Replace {AccessToken} with your actual access token
access_token = "{AccessToken}"
payload = {
"marketplace": "US",
"asins": ["B0953SDCRG"]
}
headers = {
"Content-Type": "application/json",
"Authorization": f"Bearer {access_token}"
}
response = requests.request("POST", url, json=payload, headers=headers)
print(response.json())
```
### Check the status of the import job
After you have imported the product, you can check the status of the import job by using the [Get Import Job API](/api-reference/products/get-import-job).
```python theme={null}
import requests
url = "https://api.kua.ai/weaver/api/v2/products/import/{id}"
# Replace {AccessToken} with your actual access token
access_token = "{AccessToken}"
headers = {
"Content-Type": "application/json",
"Authorization": f"Bearer {access_token}"
}
response = requests.request("GET", url, headers=headers)
print(response.json())
```
### Get Product Information
Once the import job is completed, you can get the product information by using the [Get Product API](/api-reference/products/get-product).
```python theme={null}
import requests
url = "https://api.kua.ai/weaver/api/v2/products/B0953SDCRG"
# Replace {AccessToken} with your actual access token
access_token = "{AccessToken}"
headers = {
"Authorization": f"Bearer {access_token}"
}
response = requests.request("GET", url, headers=headers)
print(response.json())
```
## Generate a Blog Post
Generate a Blog post via the [AI Generation API](/api-reference/generations/create-generation) to invoke the ASIN to Blog post AI application to generate the blog post
based on the product information imported.
View the API documentation for the AI Generation API
View the API documentation for the Get Generation API
View the API documentation for the List Generations API
### Create Blog Generation
Let's create a blog post for the product with ASIN: [B0953SDCRG](https://www.amazon.com/PETLIBRO-PLAF005-Automatic-Cat-Feeder/dp/B0953SDCRG).
```python theme={null}
import requests
url = "https://api.kua.ai/weaver/api/v2/generations"
# Replace {AccessToken} with your actual access token
access_token = "{AccessToken}"
headers = {
"Content-Type": "application/json",
"Authorization": f"Bearer {access_token}"
}
payload = {
"applicationId": "295231319878644967",
"inputs": {
"Imageposition": "2nd",
"Language": "American English",
"Link": "https://kua.ai",
"PrimaryKeyword": "Elon Musk",
"Product": "{{_product['B0953SDCRG']}}" # Replace B0787P86ZZ with your actual ASIN, {{_product['{ASIN}']}}
}
}
response = requests.request("POST", url, json=payload, headers=headers)
print(response.json())
```
Check the status of the generation
After you have created the blog post, you can check the status of the generation job by using the [Get Generation API](/api-reference/generations/get-generation).
```python theme={null}
import requests
url = "https://api.kua.ai/weaver/api/v2/generations/{id}"
# Replace {AccessToken} with your actual access token
access_token = "{AccessToken}"
headers = {
"Content-Type": "application/json",
"Authorization": f"Bearer {access_token}",
"Accept": "application/json"
}
response = requests.request("GET", url, headers=headers)
print(response.json())
if response.json()["status"] == "SUCCESS":
print("Generation completed")
print(response.json()["result"])
```
Wait for the generation job to complete(`status == "SUCCESS"`), then you can view the generated blog post in Markdown format in the `result` field.
### More AI Applications
Check more Application in [Kua.ai](https://kua.ai)
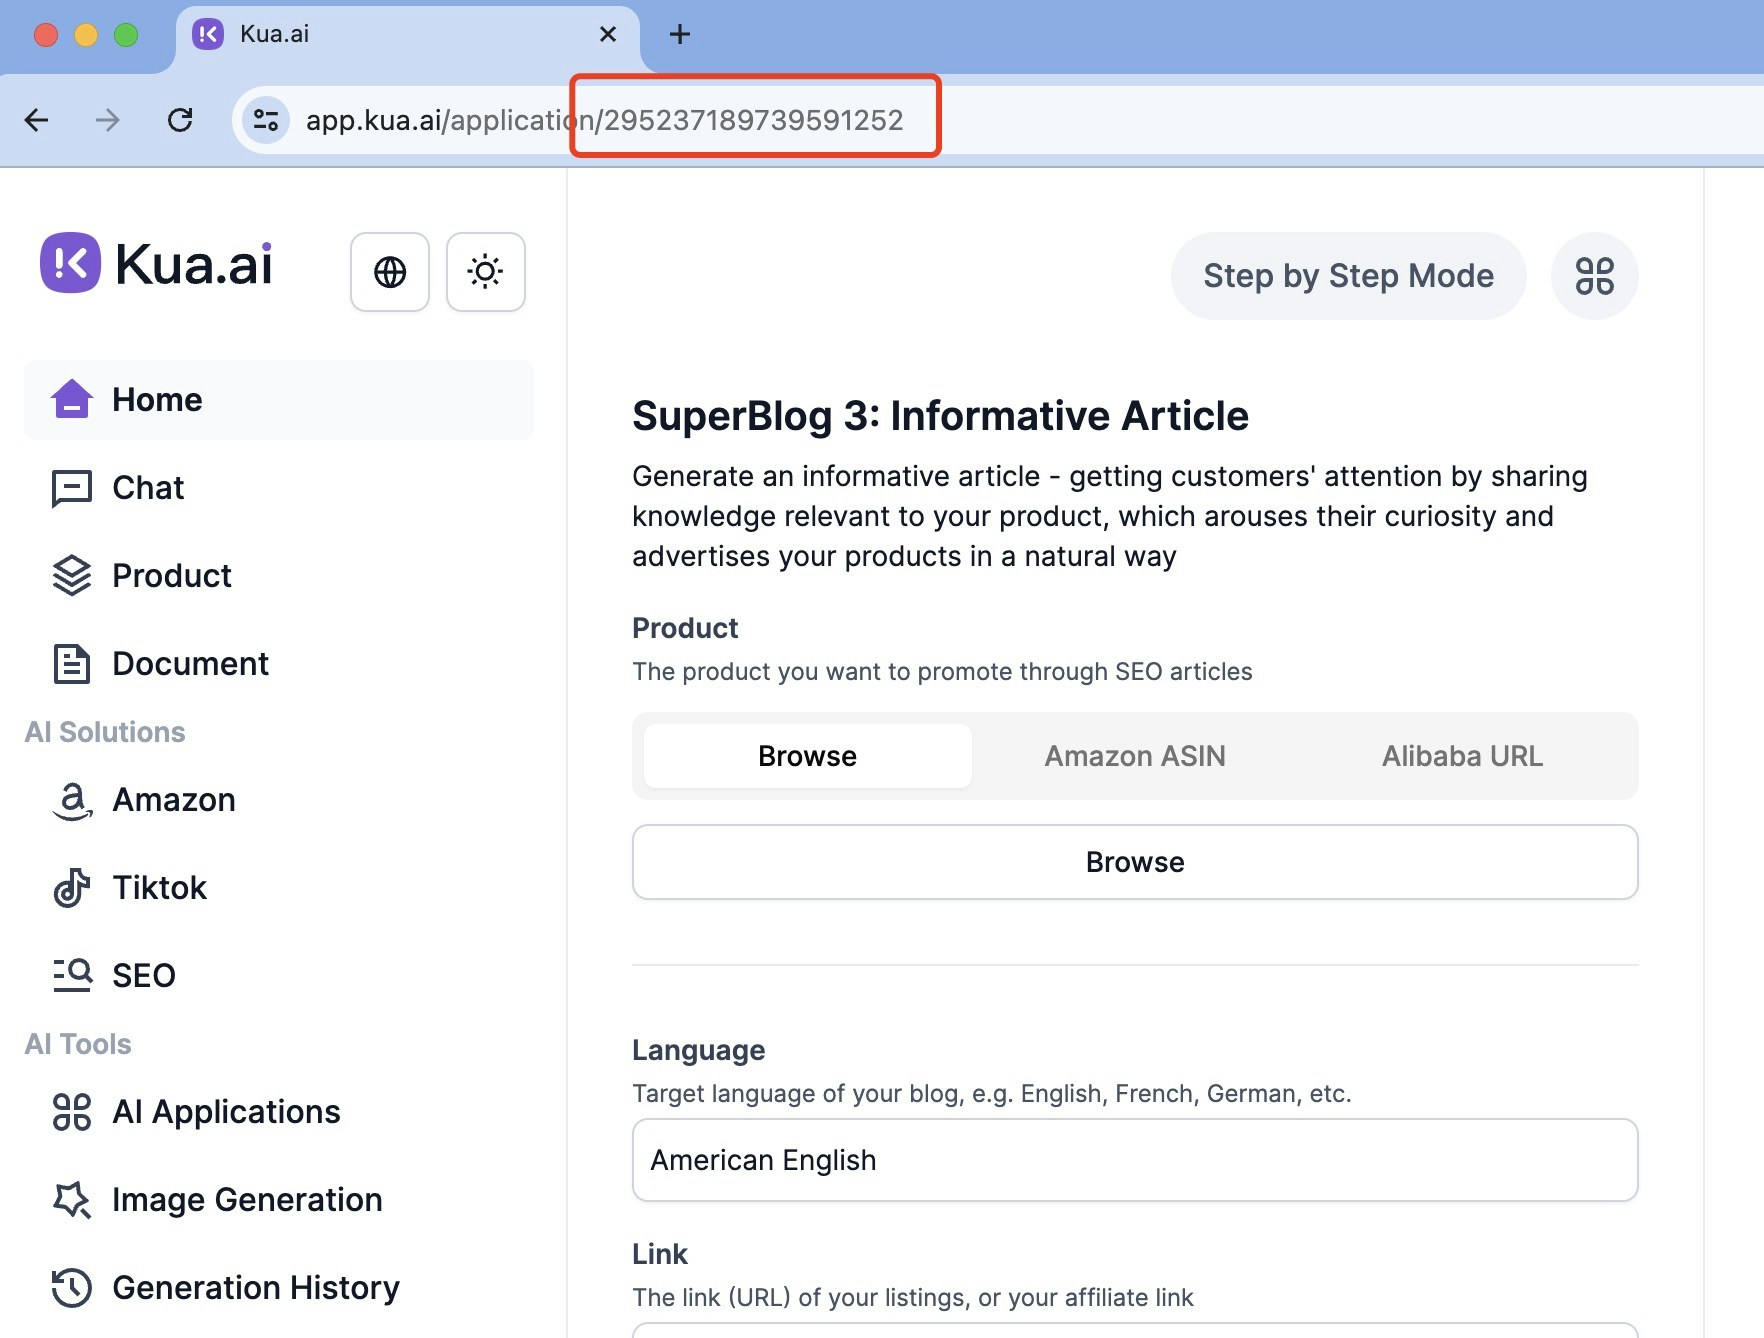
The `applicationId` is the unique identifier of the AI application you want to use. You can find the `applicationId` in the Kua.ai Application Page url.